
How To Use a Projector For Sewing & Patternmaking: Step-by-Step Beginner Guide
Using a projector for sewing and patternmaking is an efficient, paper-free way to transfer digital sewing patterns directly onto fabric. Whether you're an experienced sewist or patternmaker, or you're just starting out, projectors can save you time, money, and the hassle of printing and assembling paper patterns.

Choosing the Right Projector
Before diving into setup and tools, it's important to choose a projector that fits your needs. There are several types of projectors commonly used by sewists:
Mini Projectors - Compact, affordable, and often used for smaller projects or limited spaces.
Ultra Short Throw (UST) Projectors - Designed to project a large image from a short distance, making them perfect for smaller sewing spaces.
Short Throw Projectors - Ideal for projecting a large pattern from a moderate distance. They offer high-quality visuals but tend to be pricier.
Standard Projectors - Generally more affordable, but require more space between the projector and the fabric.
Finding the Best Deals
Instead of buying a brand new projector, you can save money by purchasing a second-hand projector. Many sewists have found excellent options at a fraction of the cost by buying used projectors off of places like Ebay and Facebook Marketplace.
One highly recommended eBay seller offers reliable, second-hand projectors that work perfectly for sewing. I purchased my Ultra Short Throw Projector from them for just $75 and it’s been amazing! Check out his inventory here and check out more about my buying process here.
Setup Types
Depending on your sewing space and personal preferences, there are a few different ways to set up your projector. Certain projector types work better with specific setups:
Ceiling Mount – Provides a permanent and stable setup. Ideal for dedicated sewing spaces where the projector will be used regularly. Requires careful alignment and calibration.
Works best with: Mini Projectors (These need to be mounted on the ceiling due to their limited range and to provide accurate projection onto your fabric).
Table Mount – A more portable option that allows you to move the projector as needed. This setup is particularly useful if you don't have a dedicated sewing area.
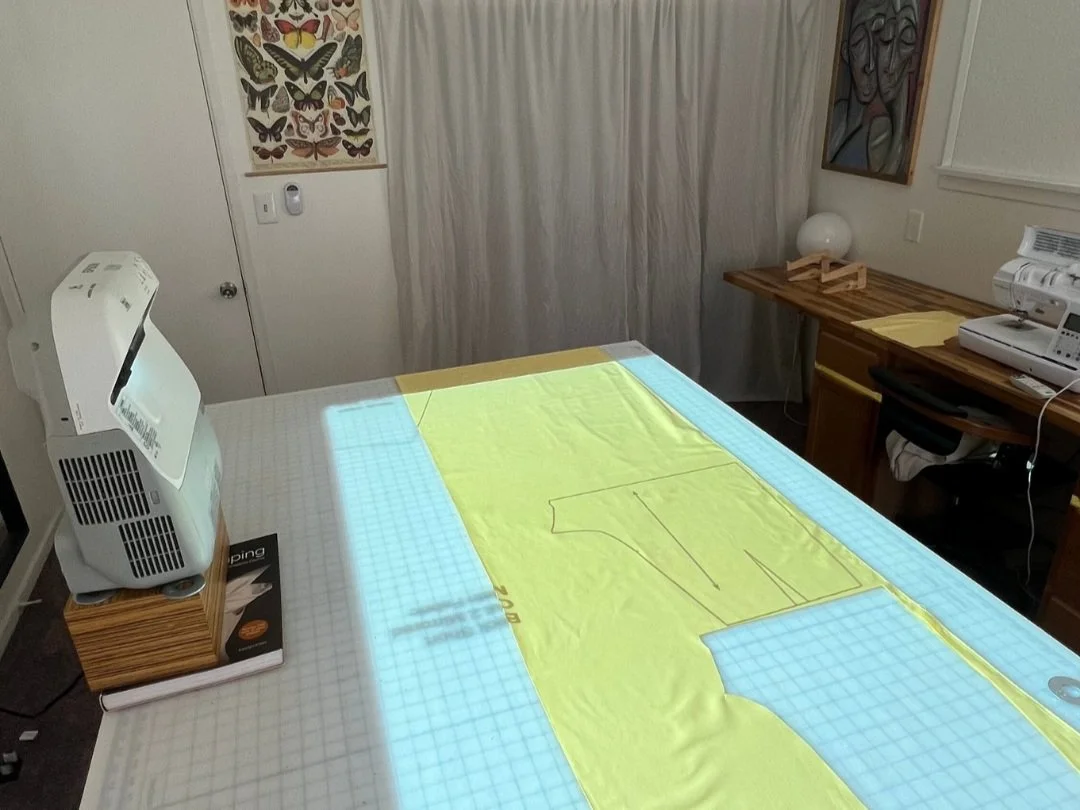
Works best with: Ultra Short Throw Projectors (These can be placed on a cutting surface, bookshelf, or other elevated surfaces due to their ability to project a large image from a short distance).
Tripod or Stand Mount – Offers flexibility and adjustability. Great for sewists who prefer a non-permanent setup or who use their projector in multiple areas.
Works best with: Standard Projectors or Ultra Short Throw Projectors (Depending on the throw distance, these projectors can be mounted on a tripod or stand to adjust for height and angle).
I highly recomend checking out @madeby_francesca’s story highlights about her projector setup. She has a ton of great resources, including information on her portable mount.
Tools and Setup Essentials
To make the most of your projector setup, you'll need a few key tools:
Large Table or Floor Space: Ensure you have enough room to spread out your fabric and project your pattern clearly.
Cutting Mat: A self-healing cutting mat provides a safe surface for cutting fabric without damaging your workspace.
Pattern Weights: Essential for keeping your fabric in place while tracing or cutting. If the fabric moves, the projection image will become distorted.
Rotary Cutter: A sharp rotary cutter makes it easy to cut precisely along pattern lines. Using fabric shears will distort the projection image as you cut.
Calibration and Testing
Once your projector is set up, you’ll need to calibrate it to ensure accurate pattern sizing. This involves projecting a test grid onto your cutting surface and adjusting the projector’s settings until the grid measurements are accurate. This resource will help make the calibration process as simple as possible!
Tips for a Smooth Experience
Make sure your room can be darkened if necessary to enhance projector visibility.
Use pattern weights to keep fabric from shifting during cutting. My go to weights are low profile flat washers from Home Depot.
Don’t be afraid to ask for help! If you get stuck, the best place to ask for advice is in the Projectors For Sewing Facebook Group.
Projectors can revolutionize your sewing and patternmaking process by eliminating the need for paper patterns. With the right setup, tools, and calibration, you’ll be cutting fabric faster and with more accuracy than ever before.
Happy sewing!
Jessica Capalbo


